
Understanding sink hardware and choosing the right components like drains, stoppers, and mounting brackets is vital for successful sink installation and repair in Toledo. This guide covers two primary options: undermount and drop-in sinks, emphasizing their unique features and benefits. It provides a comprehensive DIY replacement process, including tool preparation, removal of old sinks, inspection, new sink installation, reattachment of drainage pipes, and faucet fitting according to manufacturer instructions for both types. Professionals in Toledo offer expertise in handling leaks, clogs, and issues with traditional and modern sink setups.
Looking to replace your sink hardware? This comprehensive guide is your go-to resource for both beginners and seasoned DIY enthusiasts. We’ll walk you through the process of understanding sink hardware and its crucial role in installation and repair. From exploring options like undermount vs. drop-in sinks, to a step-by-step replacement guide, we cover all you need to know. Whether you’re in Toledo or beyond, these tips ensure a seamless fit for your next sink installation project.
- Understanding Sink Hardware and Its Importance in Installation and Repair
- Types of Sink Installations: Undermount vs. Drop-In Sinks
- Step-by-Step Guide to Replacing Sink Hardware for a Seamless Fit
Understanding Sink Hardware and Its Importance in Installation and Repair

Understanding Sink Hardware and Its Significance in Installation and Repair is paramount for any do-it-yourselfer or professional contractor. Sink hardware, encompassing components like drains, stoppers, supply lines, and mounting brackets, forms the backbone of a functional and aesthetically pleasing kitchen or bathroom fixture. The right hardware ensures smooth water flow, secure sink placement, and easy maintenance—all crucial factors in maintaining a sink’s longevity and performance.
In Toledo or any other location, whether you’re tackling a simple drop-in sink installation or an intricate undermount design, selecting the appropriate hardware is key. A well-chosen drain system, for instance, can prevent clogs and ensure efficient water drainage. Moreover, understanding compatibility with your chosen sink material and style allows for seamless integration, enhancing both functionality and the overall aesthetic appeal of the space.
Types of Sink Installations: Undermount vs. Drop-In Sinks
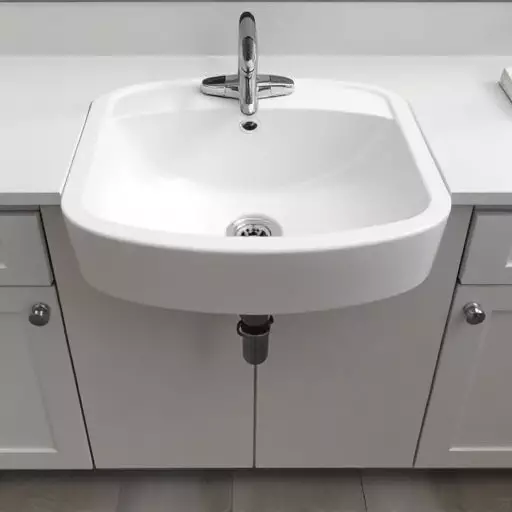
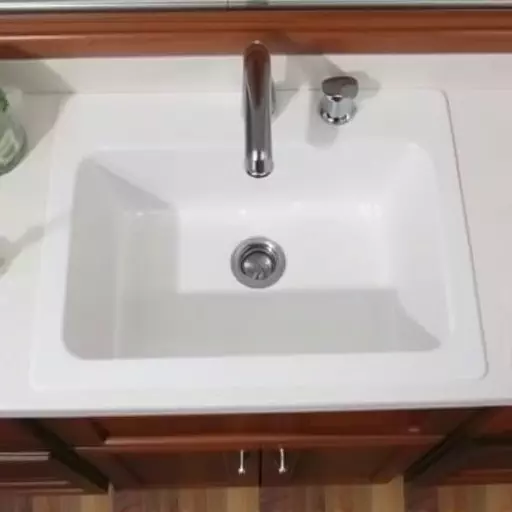
When it comes to sink hardware replacement or installation, understanding the types of sinks available is key. Two common options are undermount and drop-in sinks. In an undermount sink installation, the basin is affixed beneath the countertop, creating a seamless appearance that’s both modern and sleek. This type of sink installation and repair in Toledo is ideal for those seeking a minimalist look in their kitchen or bathroom. On the other hand, drop-in sinks are mounted from the top of the countertop, offering easier installation and access for repairs. They’re versatile and can complement various countertop materials and styles.
Whether you’re opting for an undermount sink installation or drop-in sink installation, proper placement and levelness are crucial. For sink installation and repair services, it’s recommended to consult with professionals who can ensure your new hardware fits seamlessly into your space. This is especially true for sink repairs, as issues like leaks or clogs can be addressed promptly by experts familiar with both traditional and modern sink setups.
Step-by-Step Guide to Replacing Sink Hardware for a Seamless Fit
Replacing sink hardware is a straightforward process that can significantly enhance your kitchen’s aesthetic and functionality. Here’s a step-by-step guide to ensure a seamless fit, suitable for both undermount and drop-in sinks. First, gather all necessary tools and parts, including new faucet hardware, drain plugs, and any specific mounting hardware required for your sink model. Turn off the water supply to prevent leaks during the installation process. Next, remove the existing sink by detaching the drainage pipes and carefully lifting it out of the countertop. For an undermount sink, this often involves unscrewing the clamping rings that secure it in place.
Once the old sink is removed, inspect the countertop for any damage or imperfections. Ensure the new sink’s dimensions align perfectly to avoid gaps or misalignments. Install the new sink by securing it with mounting hardware, ensuring a tight fit. For drop-in sinks, this typically involves inserting the sink into the cutout and tightening screws from beneath the countertop. After positioning, reattach the drainage pipes and test the water supply to verify proper functionality. Finally, install the new faucet according to the manufacturer’s instructions, ensuring all parts are securely fastened and sealed for a leak-free connection.